Why swift Developers should learn Objective-C First

Over the last few weeks I’ve been asked the question a lot – how do I learn Swift? Should I learn it now?

SwiftTour_2xAspiring iOS developers should begin with Objective-C, Apple’s traditional language for iOS programming.  Now you might be asking, “why, Apple just released Swift!?!”  Well, Swift does indeed look deceptively simple – one might even compare it to JavaScript, and its syntax is very similar. However, Swift is built o the same framework as Objective-C, Cocoa Touch, and uses many o the design patterns taught in Objective-C programming.  If you have a strong grasp on Objectove-C, taking the jump to Swift will be a breeze, however, for those who have no experience in Objective-C, learning Apple’s older language will give you a strong handle on Swift.

Objective-C isn’t going anywhere anytime soon.  In fact, it’ll be around for a long time. There’s currently 1.2 Million iOS apps written in Objective-C on the app store and countless other Mac apps also written in Objective-C.  As such, it’s not leaving us.

Sadly, because of the Apple NDA (non-discosure agreement), developers can’t post video tutorials or screenshots of beta software for other iOS developers to learn swift.  We can, however, produce tutorials but have to be careful what he show off in those tutorials.  Because of the NDA, resources for Swift will be limited until Apple lifts it in the Fall.

So my suggestion to aspiring iOS developers: learn Objective-C and get a good handle on it. Then make the jump to swift – everything will make a lot more sense!   Happy learning!
Advertisement

Taking the Tax Calculator Further

home-hero-whats-new-hero

In the last tutorial, we created a tax calculator app. If you didn’t follow along, I encourage you to read it first as this tutorial builds off the last one.  Today, we’re going to take the existing tax calculator all a but further by adding a tip calculator. This will again be rather straightforward and simple, but offers a easy introduction into swift.

I. Plan

Ok, so what do we want to accomplish here? Well, we want to find the amount based on a tip of let’s say 12% and then add that tip to the tax total to create a grand total for the bill.  To do this,we’re going to need some more variables – a tipPercent variable to hold the tip amount (12%), a tip variable to do some calculations, and a grandTotal variable to find the total.

II Coding

Let’s dive in!  First, we need to create a new variable called tipPercent to hold the 12%.  Let’s create a float of 0.12.

var tipPercent = 0.12

Next, inside the calculation  function, create a new variable called tip which will calculate the tip of 12% based on the total we found in the previous tutorial.  TO do so, multiply tipPercent (the variable which holds 12%) by the total to find the amount.

var tip = tipPercent * total

Notice that the tip is $3.15. Next, we need to find the grandTotal by adding the tip we calculated above to the total amount we calculated in the previous tutorial. Create a new variable and call it grandTotal.

var grandTotal = tip + total

Bam! Our total is $29.40! Next time I’m at a resturant, I’ll just write this program and find the answer!

But wait, we should have the program print out a nice little result in a string, right? Let’ do that now.

Create a constant called printed  and use string interpolation to print our the values.  Make the value a string with the variables inside.  Here’s how you do it.

let = "The tax was $ \(tax). The total cost $ \(total) and the tip was \(tip).  Ultimately, it cost me $ \(grandTotal)."

When you use a variable or constant inside a string with the \(name_of_variable), it’s called string interpolation.

Update:Download the full source code here.

Making a Tax Calculator App

cropped-swift2.png

Note: This is a beginner tutorial. 

Hey there.  Today, we’re going to make a simple little tax calculator app in Xcode 6’s playground.  This will be a very simple tip calculator, but nonetheless, it will expose you more swift code. If you’ve been following along with a few of our other articles, you should feel comfortable with what’s going on in this tutorial.

Part I

Before we get started, I think it’s best if we maps out what we’re going to do.  So let’s take a look…

We need several variables – one to  store the cost of the bill, one to store the tax amount, one to store the amount when multiplied by the tax, and one to store the total.  If that’s a little confusing right now, keep in there and it will make sense by the very end!

Part II – Coding!

Now that we have a basic plan of what we’re going to be doing, let’s dive right in and take a look.

Make sure you’re using Xcode 6 (if you’re not sure, take a look at our earlier tutorials).  Create a new playground and name it taxCalculator.  Now, delete the pre-made string value Xcode made but keep the import Cocoa line.

Great!  Now, let’s add the amount variable. To declare a variable, use the var keyword.  Let;s call this variable amount and set it to a float value of 25.00.

var amount = 25.00

Next, we need to declare the taxPercent rate and let’s set that to 5%. To do so in code, let’s create a new variable called tax and set it to a value of 0.05. Again, this value is a float, but we don’t need to explicitly declare it as a float because swift can detect it as one.

var taxPercent = 0.05

Great! We’re established two variables. Now, it’s time to use those two variables. Let’s create a function using the func keyword and call it calculation.

func calculation(){
}

You now have an empty function. Next, let’s set some variables in the function.  Declare a new variable called tax and set it equal to the amount variable times the taxPercent variable.  This will generate the amount of the tax.

func calculation(){
var tax = amount * taxPercent
}

Next, set another variable and call it total. Set it to the tax variable times the amount variable. Your function should look like this so far.

func calculation(){
   var tax = amount * taxPercent
   var total = tax + amount
}

Now, just call the calculation function.

   calculation()

Awesome! You now have a working tax calculator. We’ll continue to fine tune this in future tutorials, but it’s really easy to do this in swift, isn’t it?

Update: You can download the entire source code here

Basics

Hey again, let’s dive deeper into Swift. Power up your Xcode playground and let’s get going!

Creating a Variable

var myVariable = "Hello"

Using the var keyword, you can define a variable as in JavaScript.  The var keyword accepts various types (int, BOOL, float, etc).  By default, the word Hello is a string (a line of text) because it is enclosed in double quotes.  However, what if you didn’t want a string? Perhaps you want to set a number.

var myVariable = 3

You can also create a  string (or any other type for that matter), my explicitly declaring it a string.  Let’s check that out.

var myVariable: String = "Hello"

That’s the same as the first line of code. As such, you can also define a double in the same manner.

var myVariable: Double = 5.0

Easy? It’s quite simple!

Creating a Constant

Use the let keyword to define a constant.  Let;s take a look at an example.

let myVariable = 2

Bam, there’s a constant. See the below code for defining a BOOL.

var myVariable = true

Hello World!

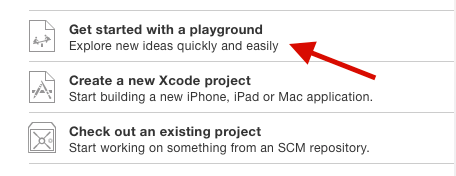
Today we’re going to start learning Swift.  I assume you have some basic knowledge as a programmer and understand basic programming techniques such as variables, loops, conditionals, etc.  If not, do a little research online and come back when you’re ready.  To begin, let’s start with the much cherished “Hello World” program.  Power up xcode (you’ll need Xcode 6 to write swift code – download the latest version off the developer website).  Once you’ve that all ready, choose Playground and let’s be on our way. Screen Shot 2014-06-05 at 4.40.38 PM Once open, you’ll be presented with a nice little window to write yourswift code  Let’s get going. Swift is similar to JavaScript in its syntax.  To write a Hello World program, first delete the code xcode automatically gives you, but keep import cocoa.  Now let’s print some code.  You use the printIn command to print text to the screen.  Let’s print Hello World.

printIn("Hello, World!")

Note that you don’t need to use semicolons to end each line in Swift. This drastically differs from Objective-C (for the better).

Well, that’s that. You just wrote your first Swift program. Congrats.

Swift Part 1

Yosemite

On June 2, Apple shocked the world with the introduction of Swift, a revolutionary new programming language designed to make it easier to write beautiful Mac and iOS apps.  Swift works with Objective-C and the Cocoa frameworks so implementing it shouldn’t be a problem.  Today, we’re going to look into Swift and see how it works.

Let’s get going!